🧰 Step 1: Gather Your Materials
Before you start crafting your paper flower, make sure you have all the necessary supplies on hand. You don’t need anything fancy — just a few basic tools will do the trick:
- Colored craft paper (choose your favorite shades for petals and green for stems and leaves)
- Sharp scissors (for clean, even cuts)
- Craft glue or a glue stick (quick-drying is ideal)
- A round object (like a thin paintbrush or pencil — used to curl paper into swirls)
Having everything ready beforehand will make the crafting process smoother and more enjoyable!
🌼 Step 2: Make a Simple and Cute 4-Petal Paper Flower
This easy and adorable design is perfect for quick crafting sessions — and the result is just as beautiful!
📄 What You’ll Need:
- 3 square sheets of craft paper (recommended size: around 4 x 4 inches)
✂️ Folding & Cutting:
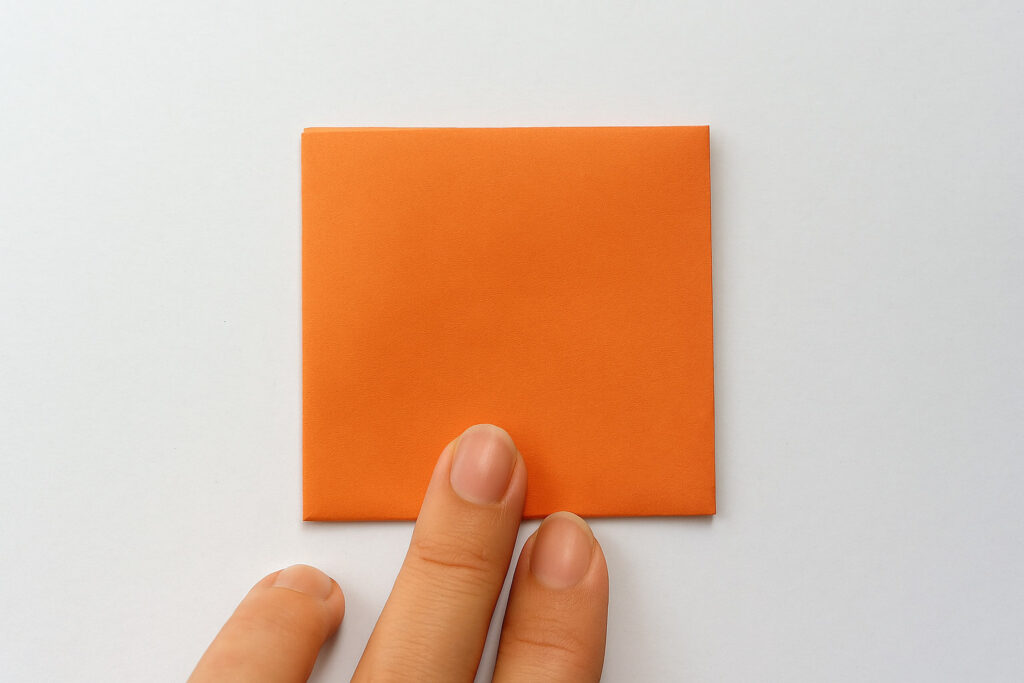
- Fold each paper in half twice to create a small square.
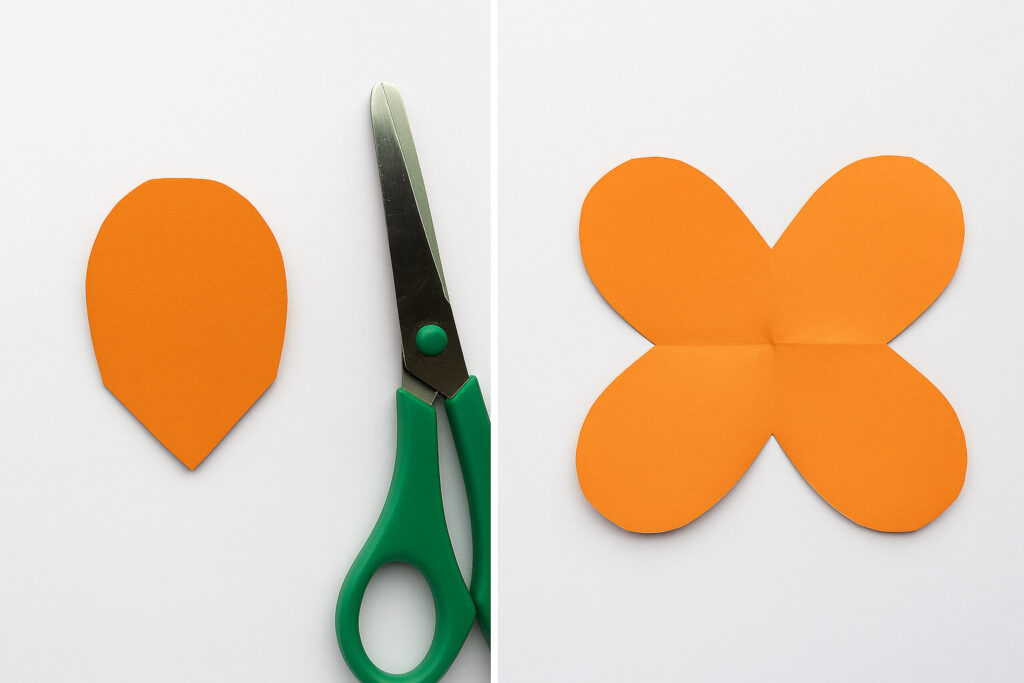
- Cut an arched shape at the top of the folded edge.
- Repeat the process with the two other pieces.
- When unfolded, each will form a 4-petal flower shape.
🧩 Layer Preparation:
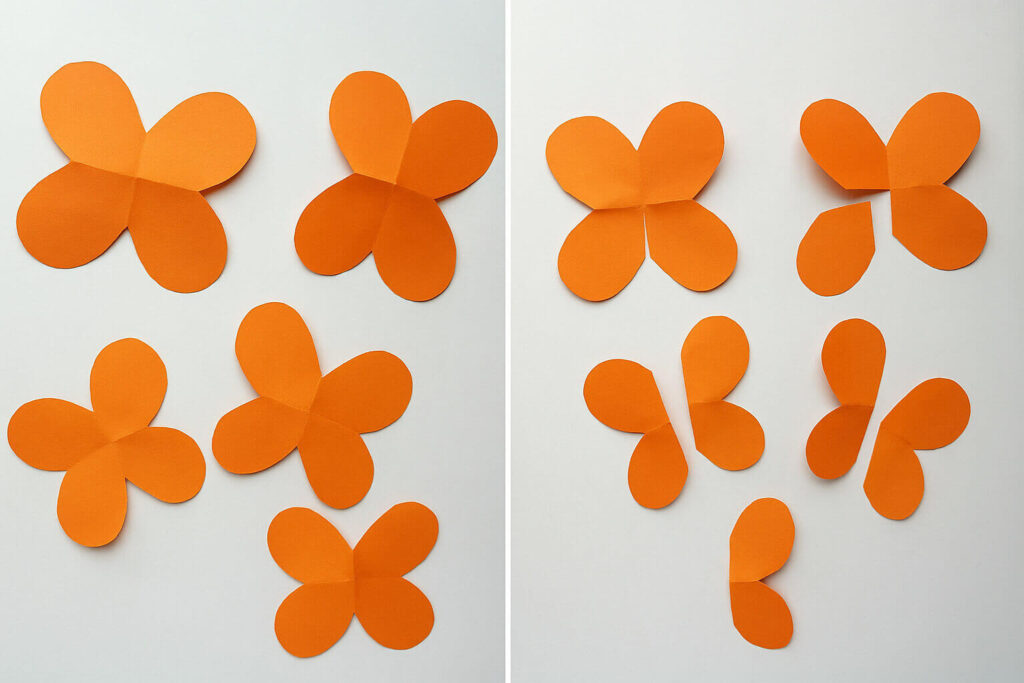
Now, trim the petal layers to create smaller sets:
- 2 pieces with 3 petals
- 2 pieces with 2 petals
- 2 pieces with 1 petal
Just like in the previous steps, apply glue to one edge of each layer and join it to the opposite edge to create cupped petal shapes.
🌸 Assembling the Flower:
Start by layering the largest petal shapes at the bottom and work your way up to the smallest, gluing each one carefully in the center for a full, dimensional look.
💛 Add the Center (Stamen):
Cut a thin strip of yellow craft paper, fringe it with scissors, and roll it into a spiral to create a realistic stamen. Glue it in the center of your flower for a bright, finished touch.
🌿 Optional Finishing Touches:
You can:
- Add a stem and green paper leaves,
- Place your flower in a mini paper vase,
- Or use it in DIY wall art, wreaths, greeting cards, or table décor.
Let your creativity flow — you might even invent your own petal pattern!
Enjoy crafting your charming 4-petal paper flowers! 🌸
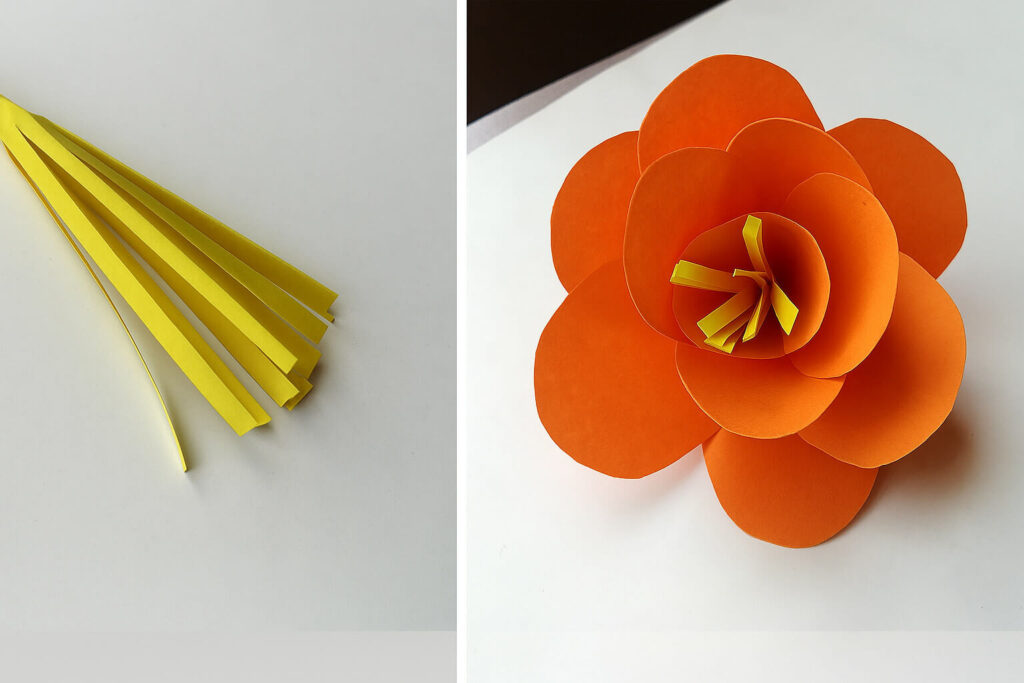
🌺 Step 3: Cut and Shape the Petals (6 petals)
To create a full and layered paper flower, you’ll start by making several petaled paper layers.
✂️ Here’s how:
- Cut four square pieces of colored craft paper, each measuring 4 x 4 inches.
- Fold each square in half, then into thirds, just like you would for making a paper snowflake.
- On the folded paper, either draw a petal outline or simply cut an arched shape along the open end — this will form a 6-petal flower when unfolded.
- Repeat for all four squares to get four 6-petal layers.
🎨 Shaping the Petals:
- Use a small round object like a paintbrush, pencil, or skewer to gently curl the ends of each petal, giving them a more natural, 3D look.
🧷 Cutting and Gluing:
- Take each flower piece and cut out some petals according to the layering plan:
- 2 pieces with 5 petals
- 1 piece with 4 petals
- 2 pieces with 3 petals
- 1 piece with 2 petals
- 2 pieces with 1 petal
- Apply a small amount of glue to one side of each flower and join the two ends together to form slightly cone-shaped layers.
🌼 Layering Your Flower:
Begin assembling your flower by gluing the petaled layers on top of each other, starting with the largest (6-petal) pieces at the bottom and gradually stacking the smaller ones toward the top.
This layering technique gives the final flower a realistic, full-bloom look, perfect for DIY décor, gifts, or handmade bouquets.
🌼 Step 4: Creating the 8-Petal Flower Layers
This step adds volume and elegance to your paper flower by building layered petals from square sheets of craft paper.
📏 Materials Needed:
- 4 square pieces of craft paper (recommended size: 4 x 4 inches)
✂️ Folding & Cutting:
- Take one square and fold it in half, then fold it again into three equal parts.
- At the open end, draw or cut an arched petal shape.
- When unfolded, each piece will give you a 6-petal flower shape.
- Repeat the same process with the 3 remaining papers to create 4 flower layers.
🎨 Shaping the Petals:
- Use a thin round object like a paintbrush or pencil to curl the petals outward, adding depth and a more natural shape.
🧷 Cutting & Forming Layers:
Now, trim the petaled shapes to create different layers:
- 2 pieces with 5 petals
- 1 with 4 petals
- 2 with 3 petals
- 1 with 2 petals
- 2 with 1 petal
Apply a small amount of glue on one edge of each piece and join it to the opposite side, turning each layer into a gentle cone shape.
🧩 Assembling the Flower:
Begin stacking the petal layers:
- Start with the largest (5-petal) pieces at the bottom,
- Gradually layer the smaller ones on top,
- Finish with the single-petal pieces at the center.
Take your time to align each layer carefully, adjusting angles if needed. This will help your flower look full, balanced, and beautifully textured.
🌹 Step 5: Crafting the 12-Petal Layered Flower
This step focuses on making a fuller and more intricate paper flower using 12-petal layers for a stunning, voluminous result.
📐 What You’ll Need:
- 4 sheets of craft paper, ideally in the same size (e.g. 4 x 4 inches)
📄 Folding & Cutting:
- Fold each paper in half twice (you’ll get a smaller square).
- Then fold that square into thirds, as if you’re making a paper fan.
- At the rounded edge, cut an arch shape to form the petals.
- Repeat with the 3 other papers. Once unfolded, each one will reveal a 12-petal flower shape.
✂️ Customize the Layers:
Next, cut the flower pieces to create varying petal counts:
- 1 piece with 11 petals
- 1 with 10 petals
- 1 with 9 petals
- 1 with 8 petals
- 1 with 4 petals
- 1 with 3 petals
- 1 with 2 petals
- 1 with 1 petal
🌀 Shaping & Assembling:
- Use a small round object (paintbrush, pencil, etc.) to curl the edges of each petal outward.
- Glue one edge of each petaled layer to the other side, creating cone-shaped layers.
- Begin assembling your flower by gluing the layers from largest to smallest, starting with the 11- and 10-petal bases, and finishing with the smallest ones at the center.
✅ Final Touch:
- Arrange the layers carefully, rotating each slightly for better coverage and balance.
- Press lightly to secure, and allow the glue to dry completely before moving or displaying your flower.
This technique results in a lush, realistic paper bloom that looks beautiful on its own or as part of a larger bouquet.


