Looking for a creative and easy DIY project? Learn how to make beautiful Celosia paper flowers from scratch using just a few simple materials. Whether you’re decorating for a special occasion, crafting a handmade bouquet, or simply adding a touch of floral charm to your home, these vibrant paper blooms are the perfect choice. In this step-by-step guide, we’ll show you how to create realistic and stunning Celosia flowers using colored paper — no special tools required!
Step 1: Materials Needed
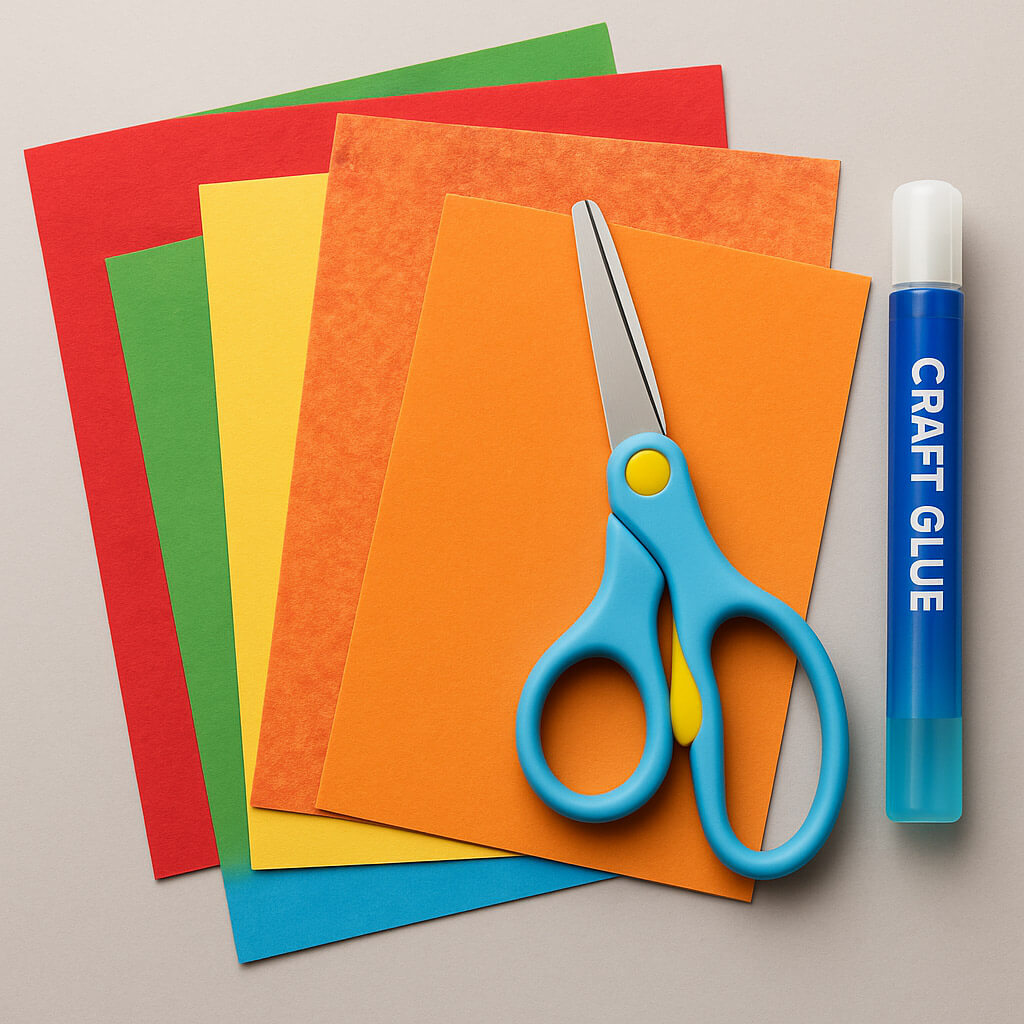
What You’ll Need to Make Your Celosia Paper Flower:
Colored craft paper (in shades of your choice)
Custom-printed or patterned paper (optional, for added texture)
Scissors (precision or craft scissors recommended)
Craft glue or hot glue gun
🌼 Step 2: Prepare the Paper Strips
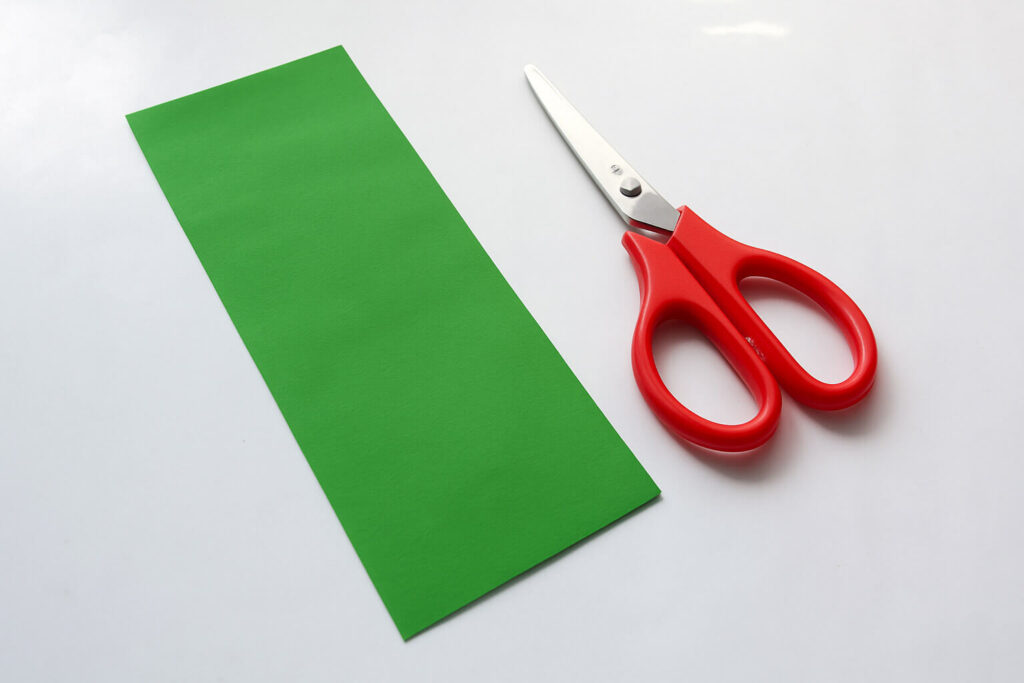
While regular craft paper works well for this project, using custom-painted or patterned paper can truly elevate the look of your Celosia paper flowers. Feel free to get creative by painting your own paper in vibrant shades — blending colors can add depth and make each petal more realistic and eye-catching.
To begin, cut your colored paper into strips that are approximately 2 inches wide. The length is flexible depending on how large or full you want your flower to be, but a good standard is 2 x 8 inches.
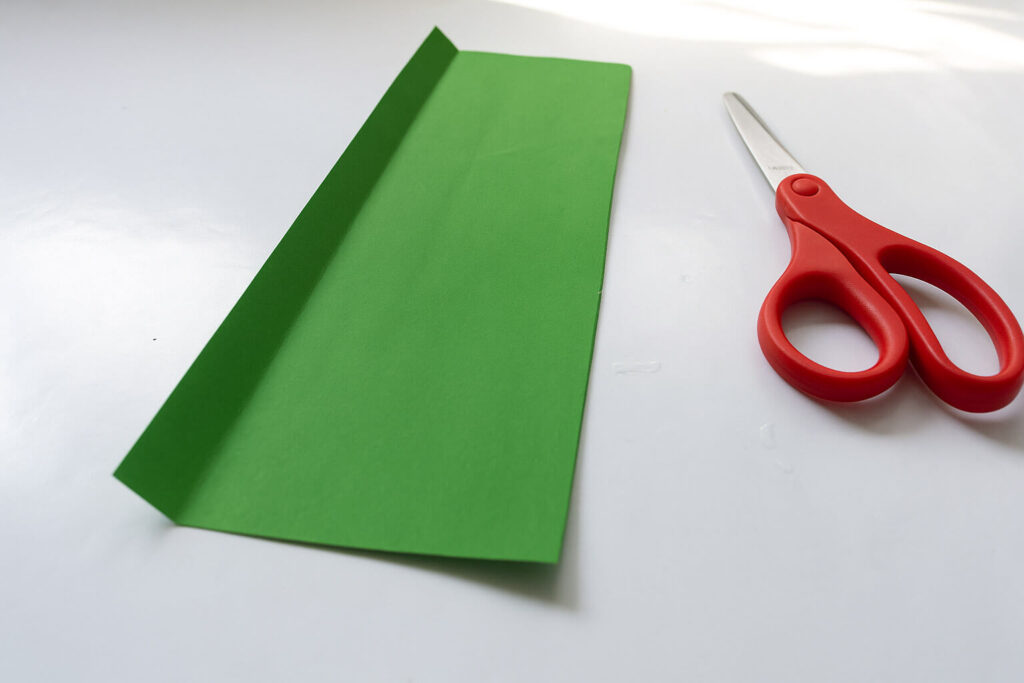
Next, fold a thin edge along one of the vertical sides of each strip. This small fold will serve as a base for shaping the petals and assembling your flower.
✂️ Step 3: Cut the Fringes
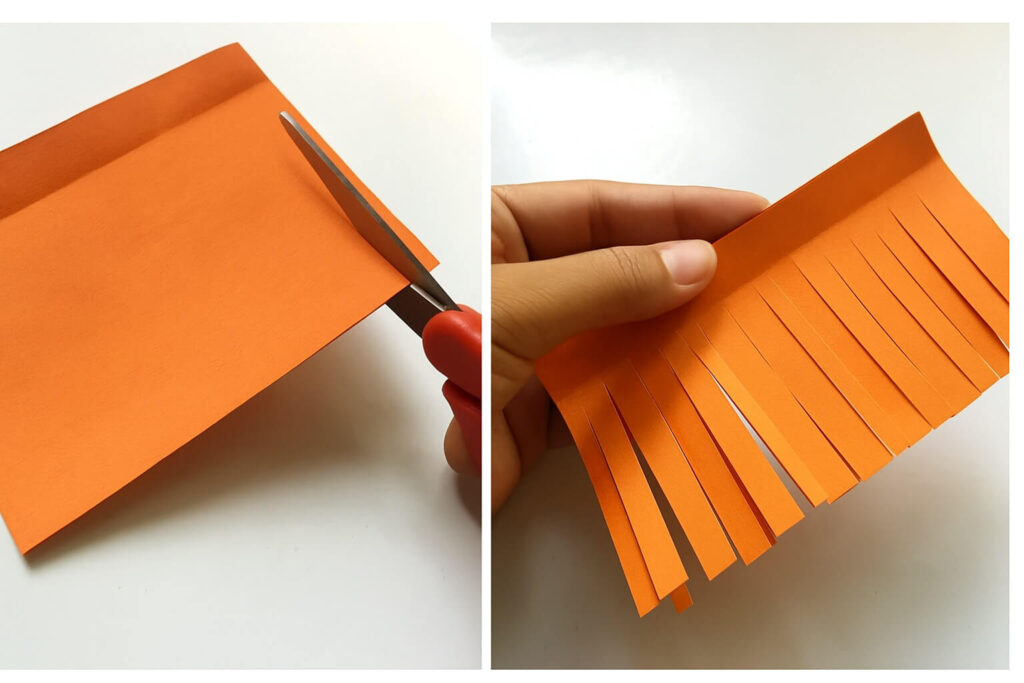
To save time, you can fold each paper strip in half before cutting — this allows you to create multiple fringes at once without compromising the final look.
Using a pair of sharp scissors, cut horizontal fringes along the length of the strip, making sure not to cut all the way through. Leave about 1 cm of space along the vertical edge — specifically, keep the thin folded line you made in Step 2 intact. This area will help you roll and secure the flower later.
For best results, try to:
Keep the fringes evenly spaced
Make the cuts as thin as possible — thinner fringes create a more delicate, fluffy look that closely mimics the texture of real Celosia blooms
Take your time — precision here will pay off in the final result!
Don’t worry if it’s not perfect — each flower will have its own unique charm.
🌀 Step 4: Create the Swirls
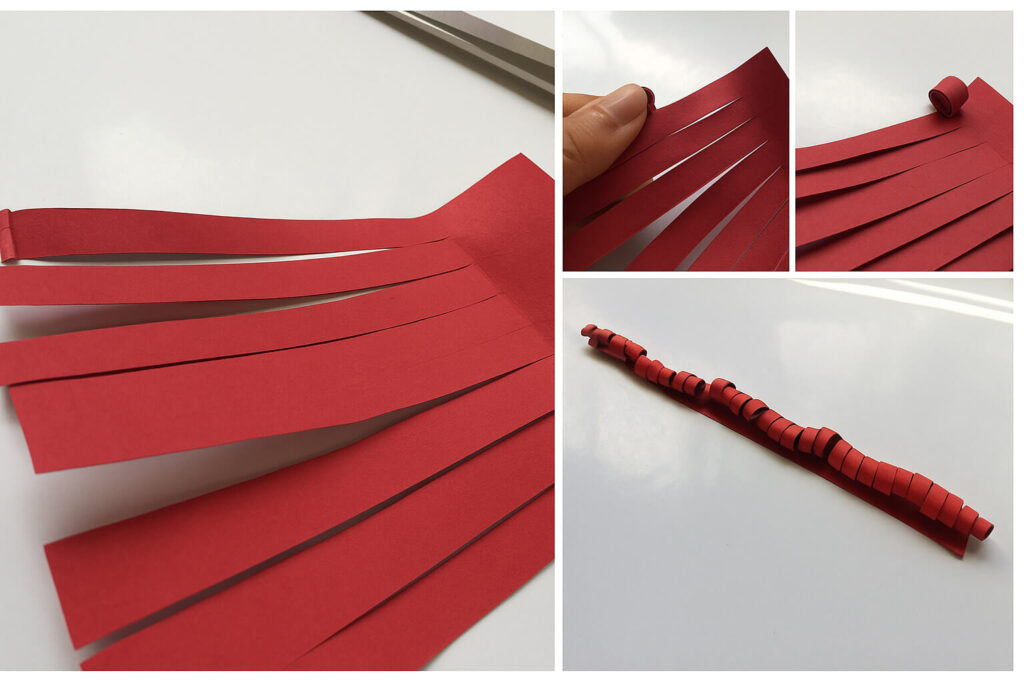
Now that your fringes are neatly cut, it’s time to give them that signature Celosia texture by rolling each fringe into tight swirls.
Start at the tip of each thin fringe strip and gently roll it inward, continuing all the way to the base. Use the full length of each fringe to form a complete swirl — this step adds volume and realism to your paper flower.
💡 Tip:
Take your time with this part! Although it’s the most time-consuming step, it’s also the most important. The delicate, curled edges are what give the Celosia flower its signature fluffy and intricate look.
Work on each strip individually, making sure the swirls are even and well-formed. The more carefully you roll, the more stunning your final flower will appear.
Trust the process — your patience will pay off!
🌿 Step 5: Make the Stem
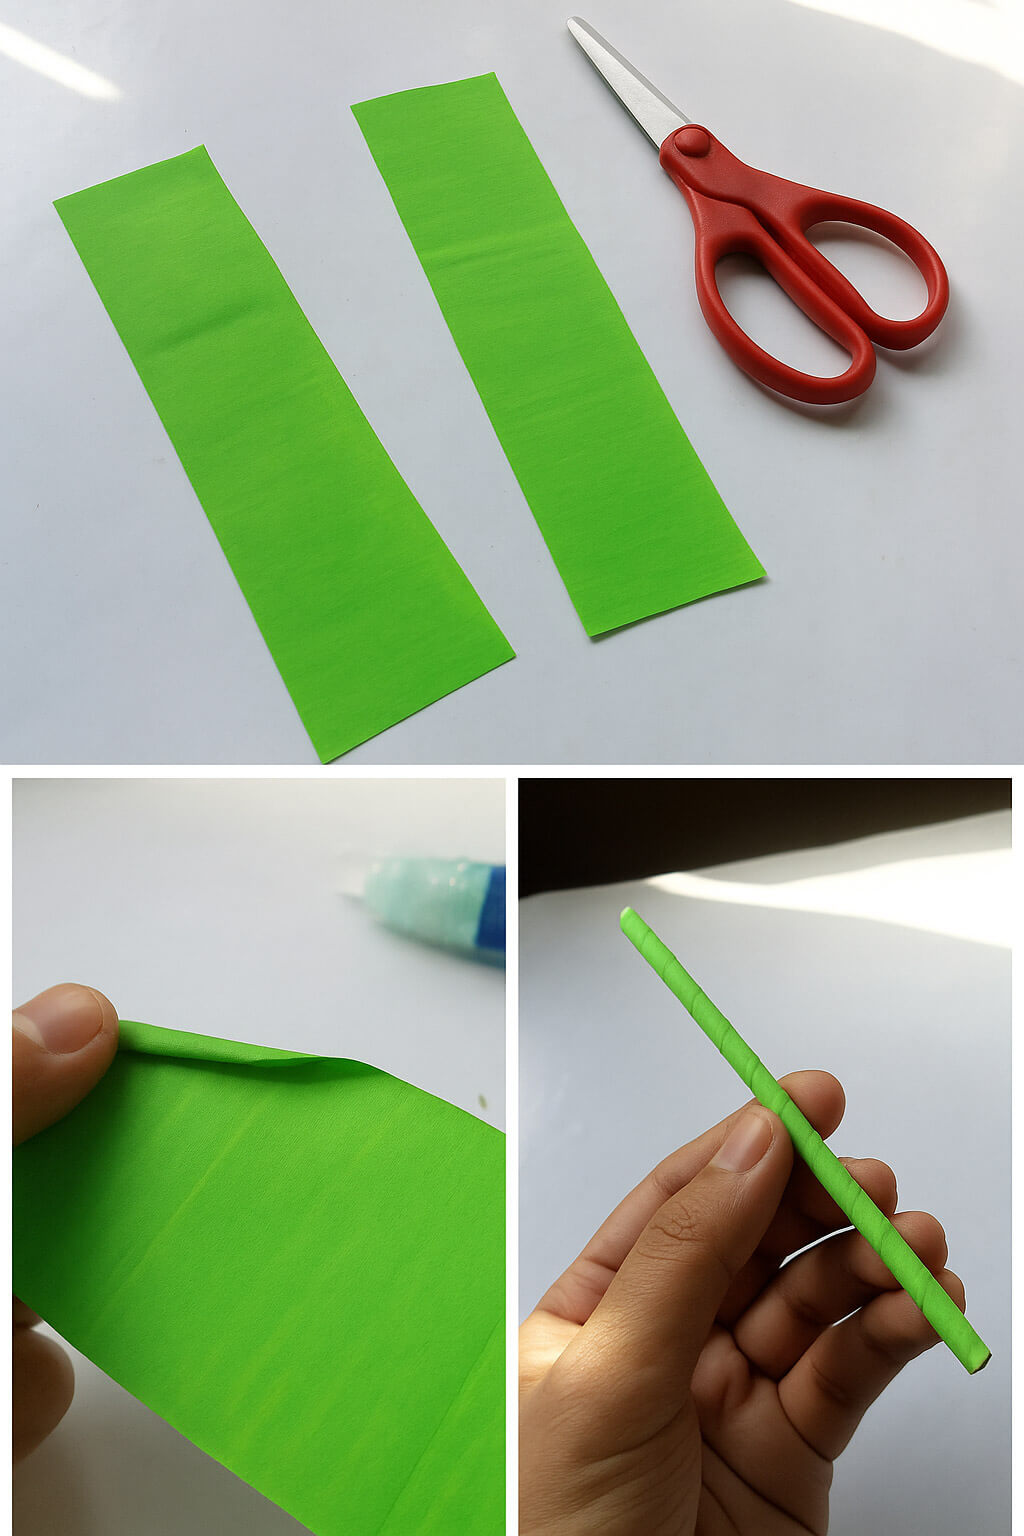
Before assembling your Celosia paper flower, you’ll need to create a sturdy stem to support the bloom.
Take a piece of green craft paper — this will mimic the natural stem of the flower. Cut a long strip measuring approximately 2 x 10 inches.
To form the stem:
Start rolling the strip diagonally from one corner, creating a tight tube as you go.
Keep rolling until you reach the opposite corner to ensure the stem is smooth and even.
Once rolled, apply a small amount of glue at both ends to secure the shape and prevent it from unrolling.
This simple but essential step provides the foundation for your paper flower and helps it stand or be used in arrangements and crafts.
🌸 Step 6: Assemble the Flower
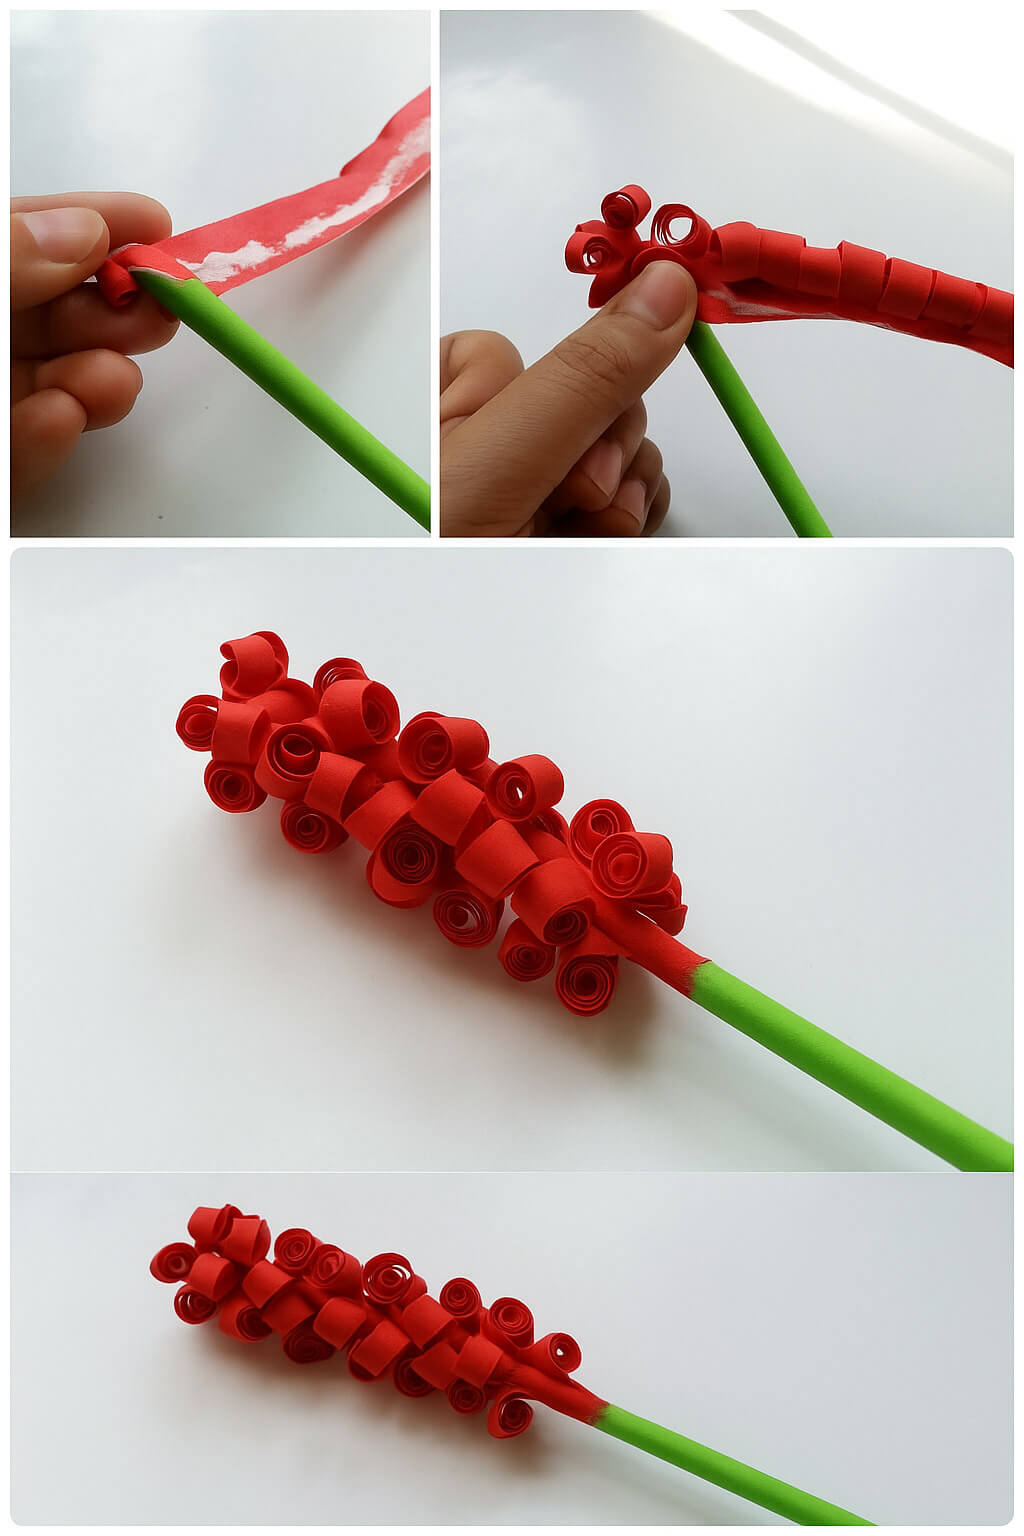
Now it’s time to bring your Celosia paper flower to life!
Take the swirled fringe strip you prepared earlier and apply glue along the uncut edge — this is the intact portion at the base of the fringes. (If you’re following along with a visual guide, refer to the first image of this step to see exactly where to apply the glue.)
Once glued:
Attach the swirled paper to the top of your green stem, wrapping it gently around.
Start at the top and roll the fringed strip downward along the stem, pressing lightly as you go to secure the shape.
Continue wrapping and gluing until the entire strip is attached.
As you finish, you’ll see the flower take shape — full, textured, and incredibly pretty.
Take a moment to admire your creation — you’ve just made a beautiful handmade Celosia paper flower!
🍃 Step 7: Add the Leaves
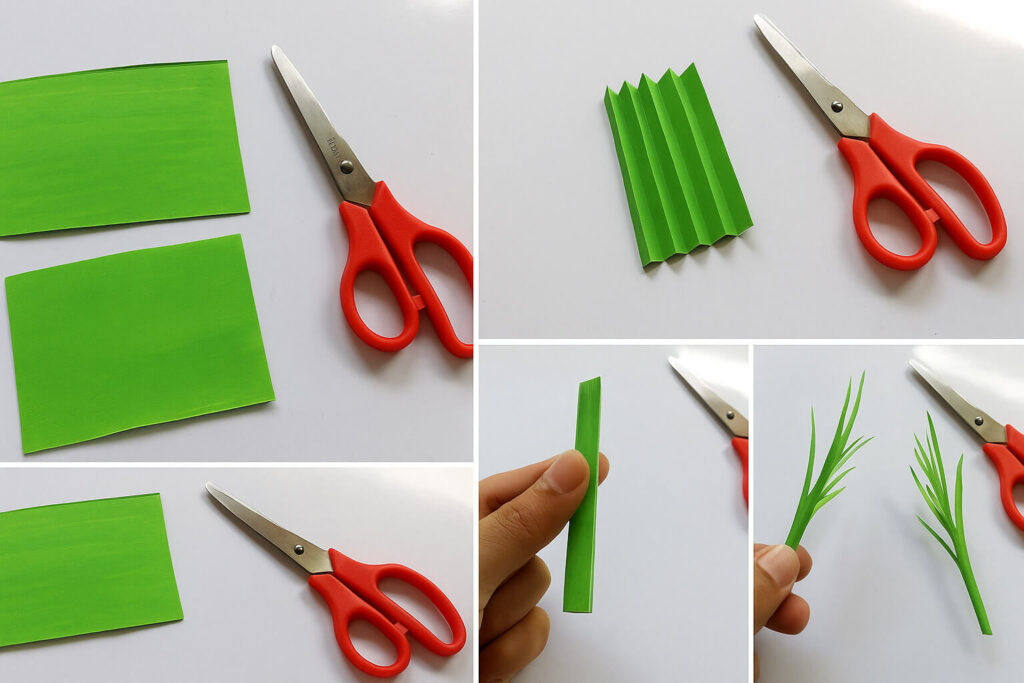
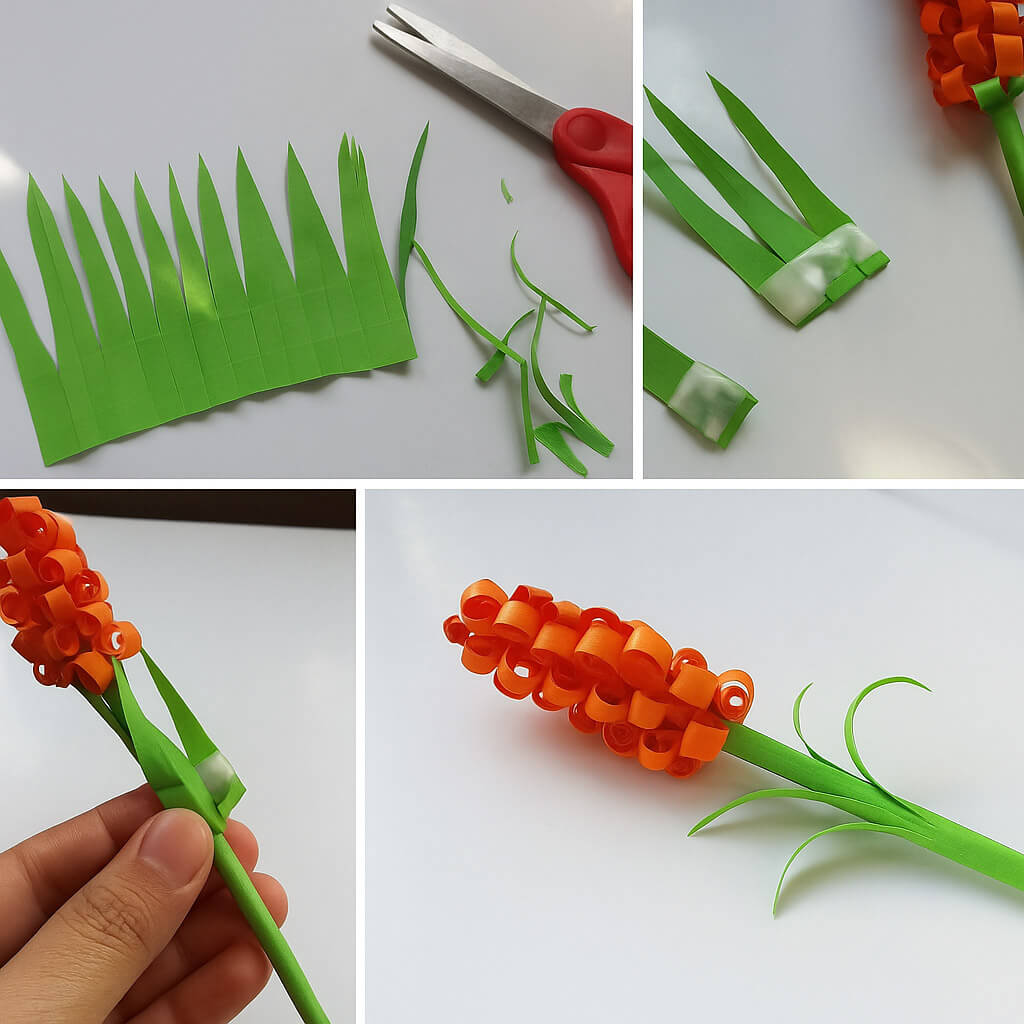
To complete your Celosia paper flower, it’s time to add a touch of greenery by crafting simple paper leaves.
Use green craft paper and cut a piece about 2 x 3 inches.
Fold the paper using a 1 cm accordion fold (back and forth like a fan).
Once folded, cut one end into a pointed leaf shape.
Gently unfold the paper to reveal a textured, natural-looking leaf.
Finally, wrap and glue the leaf around the stem, just beneath the flower head.
That’s it — your handmade Celosia paper flower is complete!
🌈 Feel free to experiment with different colors and sizes to create a whole bouquet. Paper flower crafts are not only fun but also a wonderful way to express creativity and decorate your space with something unique and handmade.
🎉 Final Thoughts

Creating your own Celosia paper flowers is not only a relaxing and creative DIY activity, but also a great way to add a splash of color to your home, events, or gift wrapping. With just a few basic supplies and these 7 easy steps, you can craft stunning, realistic blooms that never wilt.
Whether you’re a beginner or a seasoned crafter, paper flowers offer endless possibilities for customization and fun. Try mixing different shades, experimenting with textures, or even turning your bouquet into a handmade centerpiece!
🖍️ Looking for more paper flower tutorials or printable craft ideas for kids and adults?
Be sure to explore our full collection and let your creativity blossom.
